|
|
|
Cost: $140 or less
Difficulty:
Time: 4hours
|
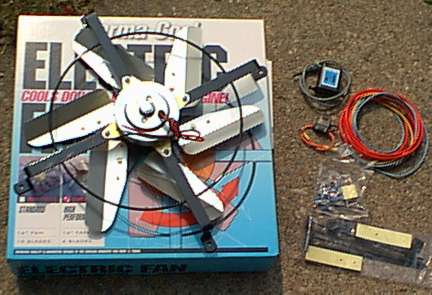
Perma Cool 16" electrical fan.
|
|
After having some problems with my BMW E34 fan clutch, I
decided to install an electrical fan. The cheapest is the
one that has the most flow: the perma
cool fan #771-19115. Buy it from summit
racing or jegs
($89). Don't buy it from perma cool as they will charge
you ($149.00, go figure...)
Basically, the advantage of the fan clutch is a very small
HP increase because there is no draw of power from the engine.
The back side is that if the thermostat fail or the electrical
fan itself, well, you don't have any more fan.
You have two choices: Installing the fan directly onto the
radiator (I would not advise to use the through the radiator
straps, these fans are heavy and in time will bend the fins
and the fan will sag) or installing it onto the fan shroud.
|
| Procedure |
- Perma cool 16" fan.
- Pliers, hammer
- Electrical tools: multimeter, solder iron and crimp tool,
shrink wrap and tie wraps.
|
|
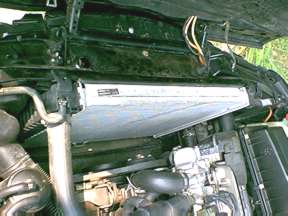
1- Remove the fan clutch and the fan shroud. To remove the
fan shroud, there is two plastic pins on each side of the
radiator that you have to remove. Pull up to remove the shroud.
|
|
|
|
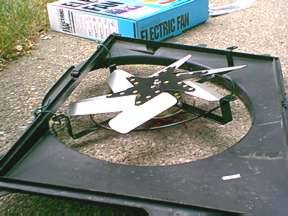
2. This is what will separate the boys from the
men. See the fan, see the shroud... You have to bend the black
tabs to fit the shroud.
Well, guess what the fan must fit the shroud and must not touch
the water pump pulley, the fan blade must not touch the radiator
neither...
No trick, just plain metal forming with basic tools... Good
luck. |
|
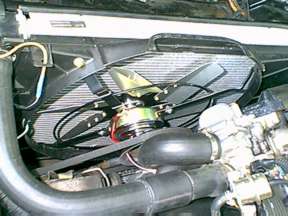
3. And voila: the final product.
I used 4 screws and nuts to hold the fan to the shroud. I
welded two wires to the fan wire (they are pretty short) and
used shrink wrap to protect the connection.
|
|
| |
| a) Perma cool adjustable thermostat: |
|
|
3a. The easy way (I thought) was to buy the perma
cool adjustable thermostat. All the wiring is included with
the thermostat.
The perma cool thermostat # 771-18905 includes all the wiring,
in line fuses you need. Unfortunately,
it doesn't seem reliable as mine failed 2 months later.
Disconnect the battery.
Black fan wire: to any ground screw.
Red fan wire: to the yellow wire. |
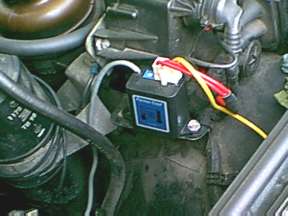
4a. The documentation included in the kit is self
explained. On the plug, keep only the red, black and yellow
wires, the other wires are if you want the fan to run when the
A/C is on. Remove them if you want (I did) as the E34/E32 has
an auxiliary fan for the A/C.
Red wire: connect it to the + connector. Remove the black
cover, unscrew the nut and placed the wire with the inline fuse.
Yellow wire: connected the the red fan wire
Black wire: to any ground screw. |
|
| |
| b) Non adjustable thermostat with relay: |
|
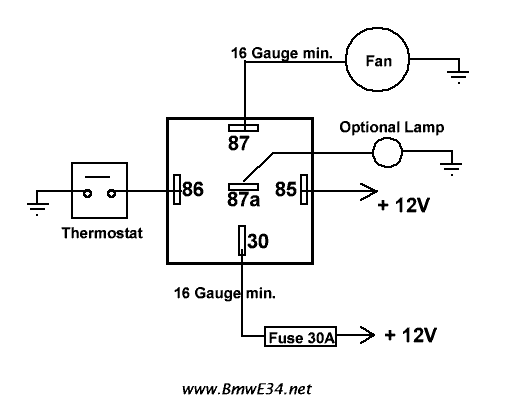
• Thermostat NO 80C leaded bought at digikey
(p/n 317-1021-ND) (Cantherm p/n: F1108015ACFA06E) $13.00
• Any auto relay NO supporting 30A min.
• 14 Gauge wires red and black.
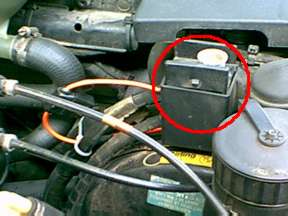
3b) Use a screw to screw the thermostat at the left of the
radiator into the fins. Attach the wires to the shroud with
a tie wrap.
Follow the diagram to wire the relay.
|
Picture soon
|
|
|
|
(Thanks ... Me for trying new things)

|
|
 |
|
|
|
|
©2000 BMWE34.net
|
-
Home of the Bmw 518i, 520i, 524td, 525tds, 525i, 535i, 530i, 540i,
M5 and other Bmw E34 chassis -
|
|
