|
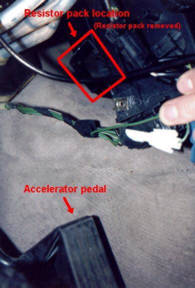
On some early E34s (6/88) LHD: you
might have a resistor pack, but mounted at the right side
(passenger side). So a resistor pack can be mounted left or
right, depending on the manufacturer of the heating housing.
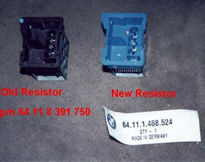
I went to the local dealer to get a new resistor pack. They
told me that it could be 3 kinds of resistor packs, all depending
on the manufacturer of the heating house, and not interchangeable.
To get the right type of resistor pack, you should know the
manufacturer, which could be Siemens, Behr or Valeo. After
some searching, I discovered the name of the manufacturer
on the heating housing (near the air duct for the back passengers),
in my case Valeo.
Information from Henno de Bruin.
1. If you didn't see anything on the driver side, you have a final
stage also called "sword".
2. Remove the glove box.
3. Remove the carpeted panel on the right side of the center console.
3. Remove screws holding the plastic cover at the left of the glove
box then slide it forward and out.
4. Remove the ventilation air duct screws (behind the glove box)
and pull it out.
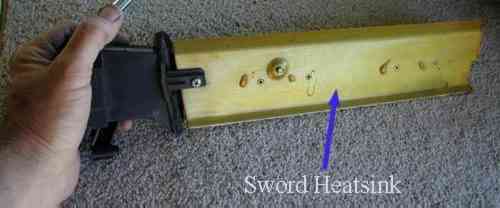
5. Disconnect all the plugs of the final stage unit, remove the
holding screws and pull the "sword" out.
6. Installation is reverse of removal.
Procedure for SWORD repair
You can recondition your sword, component cost is $3.52. You can
purchase electronic parts from Mouser electronics (www.mouser.com),
stock numbers are listed (no affiliation).
(4) BUZ71A MOSFETS, type TO-220 mouser# 511-STP16NF06 (60v
16A N channel).(old part#: 511-BUZ71A) (thanks to Alun
and Mukund)
N-channel, 50V, 13A
(4) 8-32 x 1/4" machine screws
(4) 8-32 x 3/8" machine screws
(12) #8 flat washers
(4) 1/4 x 1/4 bronze threaded standoffs mouser# 534-1692A
1. With the sword out, remove screw from plastic
housing on sword handle and remove cover.
2. Remove locnut attaching electrical component from PCB to
"wave" plate.
3. Using a hacksaw blade without damaging nearby resistor,
cut through epoxy that attaches PCB to wave plate at each
MOSFET.
4. Grind epoxy carefully (dremel or bench grinder) on side
of PCB opposite wave plate till you hit copper. Three bonding
sites should be exposed at each location. Should be able to
twist old MOSFETs off wave plate with pliers.
5. Drill 1/16" diameter hole thru PCB as close to each of
12 MOSFET pins as possible.
6. Drill 3/16" diameter throught the swaged-over ends of each
standoff. You can now separate the PCB from the wave plate.
Careful with the 2-lead component that you unbolted previously.
7. Drill .172 diameter through PCB and wave plate where standoffs
went through. Carefully hold each MOSFET in a vise by the
edges of the metal tab, and drill it out to .172 also.
8. Bend MOSFET leads 90°, holding leads with pliers at the
attached end. Use old MOSFET to determine bend location. Take
antistatic precautions (ground yourself) before handling MOSFETs.
9. Assemble 8-32 x 1/4 screws thru PCB, and attach standoffs
with loctite.
10. Solder in MOSFET with 25W iron, deflux (mouser# 577-1676-125
12oz aerosol defluxer).
11. Lightly sand the contact patch for the MOSFET on the wave
plate. Conductivity is very important. Some people use a special
conductive grease under the MOSFET Assemble wave plate to
upstands with 3 washers under the head of each 3/8" long screw,
or grind screws to correct length - no washers required. Use
loctite. Attach your 2-wire component from #2 at this time.
12. Spray plate and PCB (whatever is exposed to oxidation)
with Fin-L-Kote UR (577-2104-125 12oz aerosol) or use spray
lacquer like I did.
Note from Scott:
This item is now out of stock at Mouser.
A search for buz-71a yields the replacement: http://tinyurl.com/58zgf
That replacement is Mouser Part #: http://www.mouser.com/index.cfm?handler=displayproduct&lstdispproductid=337892&e_categoryid=277&e_pcodeid=51229>512-HUF76407P3
New part# 511-STP16NF06 (60v 16A N channel)
Thanks to Drew Zacharda & Bill R.

|
.jpg)


